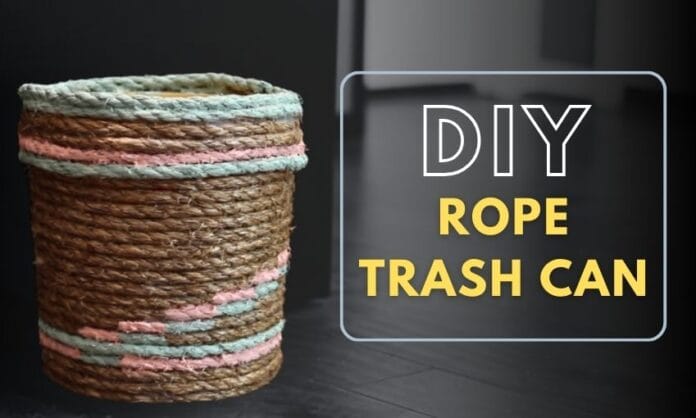
When it comes to sprucing up your home decor, even the smallest details can make a difference. A DIY rope trash can or waste basket made using a simple bucket is one of those projects that combines style and functionality. This affordable, fun craft project is perfect for adding a rustic, boho-chic vibe to any room, from the living room to the bathroom. Plus, it’s easy to do even if you’re a beginner in the world of DIY. Let’s get started on creating your own stylish rope trash can using just a few materials.
Materials You’ll Need:
- A plastic bucket (preferably a round one)
- Natural jute or sisal rope (about 50-100 feet, depending on the size of the bucket)
- Hot glue gun with glue sticks
- Scissors
- Acrylic or fabric paint (choose a color that matches your decor)
- Sponge brush or paintbrush (for applying the paint)
- Painter’s tape (optional, for creating clean lines)
- Fabric (optional, for lining the inside)
1Choose Your Bucket and Rope

The first thing you’ll need is a basic plastic bucket. You can easily find one at a local store or repurpose an old one you have lying around. Make sure the bucket is clean and dry before you start. For a classic, rustic look, natural jute or sisal rope works best, but you can also experiment with colorful or patterned ropes for a more unique touch.
Pro Tip: A wider bucket creates more surface area for the rope, giving it a bulkier and more eye-catching finish.
2Prepare Your Bucket (Optional Painting)
Before attaching the rope, you can choose to spray paint the bottom part of the bucket for a cleaner, more finished look. This step is optional but adds a nice contrast to the rope. If you decide to paint, apply painter’s tape to the areas you don’t want to get paint on and spray the base with your chosen color. Let the paint dry completely before proceeding.
Pro Tip: Use light, even coats of spray paint to avoid drips or streaks on the bucket’s surface.
3Start Gluing the Rope at the Base

Once your bucket is prepped, start by securing the end of your rope at the bottom of the bucket using a hot glue gun. Press the rope firmly into place and hold it for a few seconds until the glue sets. Continue adding glue and wrapping the rope around the bucket in a tight, even coil. Be sure to press the rope into the glue as you go to ensure it sticks firmly.
Pro Tip: Work in small sections to prevent the glue from drying too quickly.
4Wrap the Rope Around the Bucket

Continue wrapping the rope around the bucket, gluing it down as you go. Make sure the rows of rope are tightly packed together with no gaps between them. This will give the trash can a more polished look. You can decide whether to cover the entire bucket in rope or leave the top edge exposed for a contrast effect.
Pro Tip: If you run out of rope mid-project, simply glue down the end of the first rope, then start the next one where you left off.
5Finish Off the Top

Once you’ve covered the desired amount of the bucket with rope, cut the rope cleanly and glue down the end securely. Make sure the top edge is neat and well-finished. If you want a more decorative look, you can create a small handle by looping a piece of rope and gluing it onto the sides of the bucket.
Pro Tip: Use a dab of glue on the cut end of the rope to prevent fraying.
6Paint the Rope (Optional)

For a decorative touch, you can paint sections of the rope on the outside of the trash can. Use a sponge brush to carefully apply paint to the rope, creating stripes, patterns, or even just a light coating for a more polished finish. You can choose any color that matches your home decor. Be sure to apply the paint sparingly so that it doesn’t soak through the rope and onto the bucket itself.
Pro Tip: Painter’s tape can be used to mark off areas where you want clean lines or specific designs. Let the paint fully dry before using the trash can.
7Use Your DIY Rope Trash Can
Now that your rope trash can is complete, it’s ready to use! Whether you place it in your home office, bathroom, or living room, it adds a stylish touch to any space. The natural texture of the rope provides a cozy, earthy aesthetic, and the durable materials ensure that it will hold up over time.
Pro Tip: If you want to use the trash can outdoors or in a bathroom, consider adding a coat of clear sealant to the rope to protect it from moisture.
DIY Rope Trash Can infographic

Conclusion
Creating your own DIY rope trash can or waste basket using a simple bucket is not only an affordable project but also a way to personalize your space with a handmade touch. By using just a few materials, you can transform an ordinary plastic bucket into a stylish decor piece that’s both functional and attractive. Whether you choose a natural, rustic look with jute rope or experiment with colorful ropes and fabrics, this project offers endless possibilities for customization.


